blob 데이터 처리
첨부파일이 아닌, 파일을 byte 형태의 데이터로 변환해 메일을 전송해야했다.
그러기 위해서는 Oracle DB에 저장할 때 blob 타입의 칼럼을 사용해야 했다.
엄청난 삽질 끝에 알게된 내용을 미리 공유하자면,
바이트 데이터를 메일에서 사용하기 위해서는
반드시 base64로 인코딩을 해야한다.
-
또한, blob 칼럼의 default length는 4000이다.
아래와 같은 쿼리 방식으로 인코딩을해서 데이터를 가져올 수 있다.
SELECT
(UTL_ENCODE.BASE64_ENCODE(content1)) AS ATTACH1
FROM content_que;

SELECT
utl_raw.cast_to_varchar2(UTL_ENCODE.BASE64_ENCODE(content1)) AS ATTACH1
FROM content_que;
하지만, 위와 같은 방식으로는 데이터의 길이가 4000이 넘어가면 select 쿼리가 돌지 않는다(에러가 발생한다). 그래서 데이터의 길이만 조회하는 방식으로만 DBMS툴에서 확인이 가능하다.
우선 Blob 타입의 칼럼을 생성한다.
blob 데이터 생성, 추가, 삭제, 길이 조회
--생성
CREATE TABLE tms_content_que(
    content1 blob DEFAULT empty_blob()
);

--추가
ALTER TABLE tms_content_que add content2 blob DEFAULT empty_blob();

--삭제
ALTER TABLE tms_content_que DROP COLUMN content2;

--길이 조회
select dbms_lob.getlength(content1) from CONTENT_QUE;
테이블을 생성했으니, 이제 테스트 할 blob 데이터를 넣어야 한다.
샘플 예제를 작성해보자.
import java.io.*;
import java.sql.*;
import java.util.*;

public class BlobInsertNoEncode {
    public static void main(String[] args) throws IOException {
        try {
            Class.forName("oracle.jdbc.driver.OracleDriver");
            System.out.println("드라이버 검색 성공");
        }catch(ClassNotFoundException e) {
            System.err.println("error = " + e);
            System.exit(1);
        }
        Connection conn = null;
        PreparedStatement pstmt = null;
        String url = "jdbc:oracle:thin:@XXXXXXXXXX";
        String id = "ID";
        String pass = "PWD";
        String query = null;
        try {
            conn = DriverManager.getConnection(url, id, pass);
        }catch(SQLException e) {
            System.err.println("sql error = " + e);
            System.exit(1);
        }

        String filename = "C:\\test.jpg";
        String filename2 = "C:\\test2.jpg";
        File f = getFile(filename);
        File f2 = getFile(filename2);

        ByteArrayOutputStream bos = new ByteArrayOutputStream();
        ByteArrayOutputStream bos2 = new ByteArrayOutputStream();
        FileInputStream fis = new FileInputStream(f);
        FileInputStream fis2 = new FileInputStream(f2);
        while(true) {
            int x = fis.read();
            if(x == -1) break;
            bos.write(x);
        }

        while(true) {
            int x = fis2.read();
            if(x == -1) break;
            bos2.write(x);
        }
        fis.close();
        bos.close();
        fis2.close();
        bos2.close();

        ByteArrayInputStream bis = new ByteArrayInputStream(bos.toByteArray());
        ByteArrayInputStream bis2 = new ByteArrayInputStream(bos2.toByteArray());

        query = "insert into TMS_CONTENT_QUE values (?,?)";
        try {
            pstmt = conn.prepareStatement(query);
            pstmt.setBinaryStream(1, bis, (bos.toByteArray()).length);
            pstmt.setBinaryStream(2, bis2, (bos2.toByteArray()).length);
            pstmt.executeUpdate();
            System.out.println("업로드 성공!");
            pstmt.close();
            conn.close();
        }catch(SQLException e) {
            System.err.println("sql error = " + e);
        }
    }

    private static File getFile(String filename) {
        File f = new File(filename);
        if(!f.exists()) {
            System.out.println("파일이 존재 하지 않습니다.");
            System.exit(1);
        }
        return f;
    }
}
경로에 있는 파일을 읽어서 FileInputStream으로 해당 데이터를 읽어들인 뒤, ByteOutputStream에 쓰고, 그 데이터를 가지고 insert 하는 로직이다.
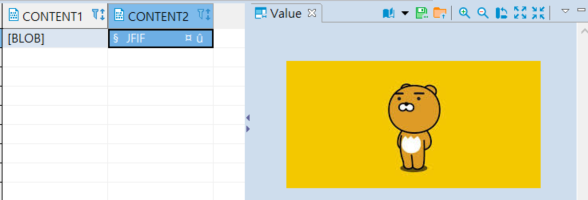
정상 insert 된 모습을 확인할 수 있다.
데이터가 제대로 들어갔다면 DBMS 툴에서 미리보기를 제공해준다.
이제 해당 데이터를 실제로 출력한 뒤, base64로 인코딩했을때의 데이터가 일치하는지를 확인해야한다.
마찬가지로 해당 데이터를 조회하는 예제를 작성해보자.
import org.apache.xmlbeans.impl.util.Base64;

import java.io.*;
import java.nio.charset.StandardCharsets;
import java.sql.Blob;
import java.util.*;
import java.sql.*;

import static java.nio.charset.StandardCharsets.UTF_8;

public class Blob2 {
    public static void main(String[] ar) throws IOException {
        try {
            Class.forName("oracle.jdbc.driver.OracleDriver");
            System.out.println("드라이버 검색 성공");
        }catch(ClassNotFoundException e) {
            System.err.println("error = " + e);
            System.exit(1);
        }
        Connection conn = null;
        PreparedStatement pstmt = null;
        String url = "jdbc:oracle:thin:@xxxxxxxxx";
        String id = "id";
        String pass = "pwd";
        String query = null;
        try {
            conn = DriverManager.getConnection(url, id, pass);
        }catch(SQLException e) {
            System.err.println("sql error = " + e);
            System.exit(1);
        }

        query = "select * from CONTENT_QUE";
        try {
            pstmt = conn.prepareStatement(query);
            ResultSet rs = pstmt.executeQuery();
            StringBuffer sb = new StringBuffer();
            if(rs.next()) {
                Blob blob = rs.getBlob("CONTENT1");
                System.out.println("streamToString = " + encodeBlobToBase64(blob));
            } else {
                System.out.println("찾는 번호는 없습니다.");
            }

            rs.close();
            pstmt.close();
            conn.close();
        }catch(SQLException e) {
            System.err.println("sql error = " + e);
        }
    }

    public static String encodeBlobToBase64(Blob data){
        String base64Str = "";
        byte[] blobToBytes = null;

        try {
            if(data != null && data.length() > 0){
                blobToBytes = data.getBytes(1l, (int) data.length());
                base64Str = ConvertBinaryStreamToString(Base64.encode(blobToBytes));

            }
        } catch (Exception e) {
            System.err.println("encodeBlobToBase64 error" + e);
        }

        return base64Str;
    }

    private static String ConvertBinaryStreamToString(byte[] encode) {
        return new String(encode);
    }
}
완성된 코드이지만, 여기서 또한 삽질 과정이 많았다..
Blob blob = rs.getBlob("CONTENT1");
InputStream is = rs.getBlob("CONTENT1").getBinaryStream()
가져온 데이터를 binary로 변환하여 사용해야한다는 생각 때문에 getBinaryStream()을 사용해 받은 is 변수를 인코딩 했었다.
그래서 아무리 값을 비교해봐도 일치하지 않았던 것이었다.
이미 바이트 데이터이기 때문에 가져온 Blob 데이터 자체를 바로 인코딩했었어야했다...
그래서 수정된 소스를 적용해 정상 발송에 성공했다.
험난했다...
'Java' 카테고리의 다른 글
| [Java] 자바8 default, static 메소드 (0) | 2021.03.20 |
|---|---|
| [Java] 주니어 백엔드 면접 단골 질문 - 쓰레드를 생성하는 2가지 방법 (0) | 2021.03.20 |
| [Java] Equals와 HashCode (0) | 2020.07.04 |
| [Java] Primitive Type VS Reference Type (0) | 2020.07.01 |
| [Java] 자바 8은 왜 쓸까? (0) | 2020.06.17 |

댓글